Retrieving Customer Widget Orders
Once a widget has been generated, the end user may now place an order against a customer.
Overview
- End user requests an order, generating an Event.
- The event system is queried for customer widget events of the specified widget ID.
- With the event information, the customer object may be queried if necessary and an order can be processed.
- Once the order is processed, the customer record can be updated with relevant information and any supplemental documentation can be sent via API and associated with the customer record.
- Status updates can be made at any step in the process, which may include a direct URL to the order.
User creates an order
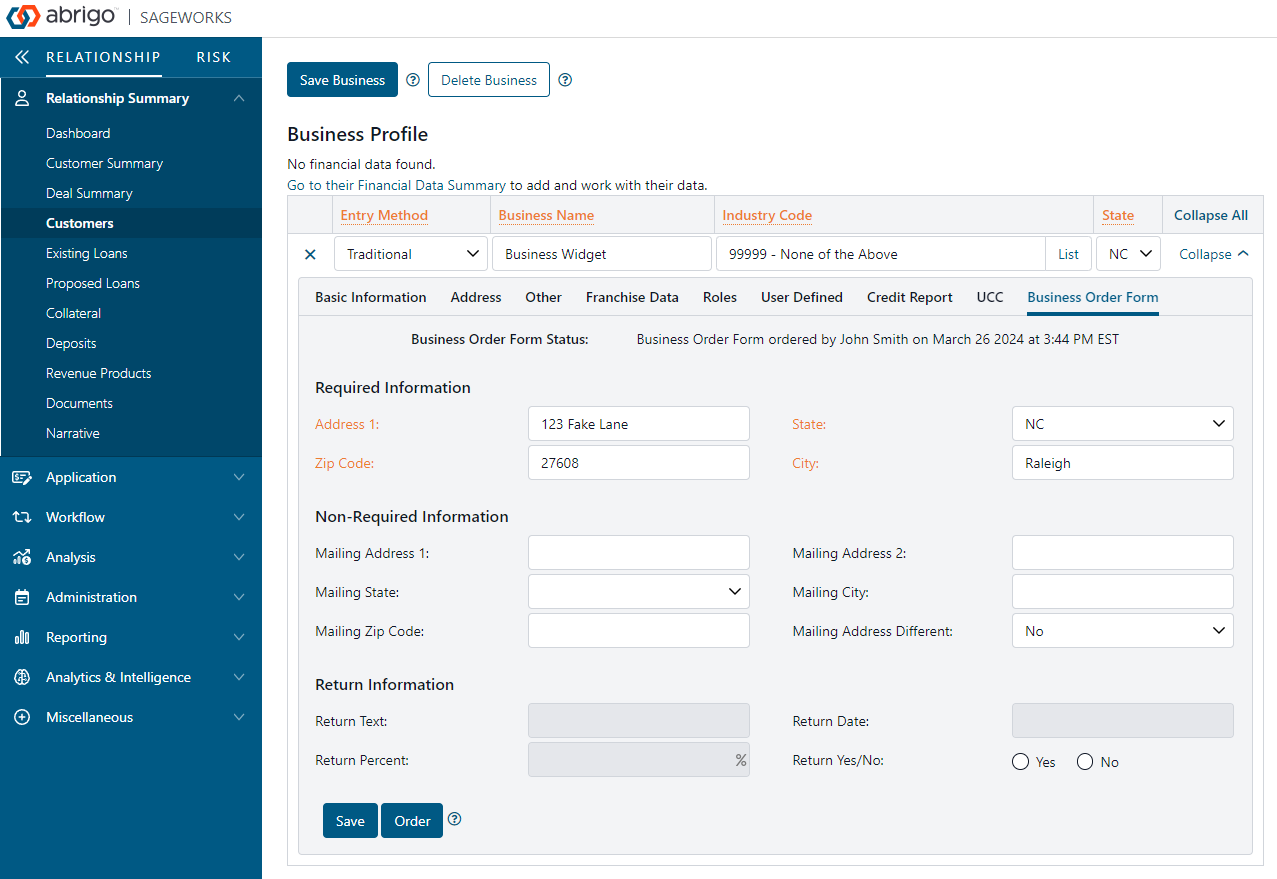
Once the widget is generated, it will appear as a tab on the customer page if the correct entity type is selected (Individual, Business, Farm, etc.). When the end user fills out any necessary information and clicks "Order", an event is generated. At that time the status will also update to [WidgetName] ordered on [date][time].
Get open events
Abrigo recommends querying for events using GET /v1/customer-widgets/{id}/events. This will get all open events for a specific widget ID. By getting only the open events for a specified widget ID, the risk of processing an unrelated event is avoided. If your institution can support Webhook polling for event tracking, please refer to our documentation here.
{
  "items": [
    {
      "id": 2638424,
      "eventTime": "2024-03-26T15:44:18.5349153-04:00",
      "eventType": "customerWidgetEvent",
      "eventContent": {
        "customerWidgetID": "10",
        "customerId": "118501611"
      },
      "isComplete": false
    }
  ]
}
Get order information
Once an order is placed and an event is open, the endpoint GET /v1/customer-widgets/values/{id}/{customerId} may be used to retrieve order information.
{
  "fieldValues": {
    "Address 1": "123 Fake Lane",
    "City": "Raleigh",
    "State": "NC",
    "Zip Code": "27608",
    "Mailing Address 1": "",
    "Mailing Address 2": "",
    "Mailing Address Different": "No",
    "Mailing City": "",
    "Mailing State": null,
    "Mailing Zip Code": "",
    "Return Text": null,
    "Return Date": null,
    "Return Percent": null
  },
  "customerId": null,
  "collateralCoOwnerCustomerIds": null
}
Post new information
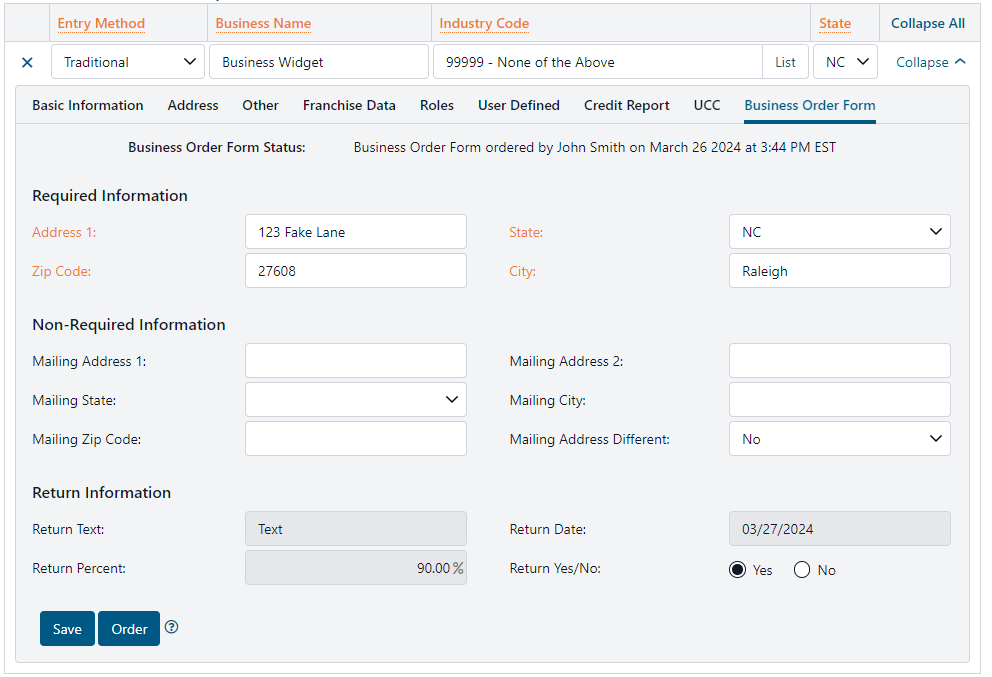
New information can be sent to the customer record using the endpoint POST /v1/customer-widgets/values/{id}/{customerId}.
{
  "fieldValues": {
    "Return Text": "Text",
    "Return Date": "03/27/2024",
    "Return Percent": "0.90",
    "Return Yes/No": "Yes"
  },
  "customerId": 0,
  "collateralCoOwnerCustomerIds": [
    0
  ]
}
{
"fieldValues": {
"Return Text": "Text",
"Return Date": "03/27/2024",
"Return Percent": "0.90",
"Return Yes/No": "Yes"
},
"customerId": 0,
"collateralCoOwnerCustomerIds": [
0
]
}
Documents
Documents may be entered into Sageworks in accordance with our documents section. The associatedCustomerId would be the ID of the customer the order was placed against. https://developer.abrigo.com/docs/posting-documents
Status updates
At any point in the process the status field may be updated. In the example above, the default status is still set from when the end user clicked the order button to create the event. PATCH/v1/customer-widgets/status/{widgetId}/{customerId} is used to make additional updates.
In the example below, the status is updated and includes a hyperlink for more information. This can be used to navigate the end user directly to the completed order form in the vendor website.
{
  "status": "Order completed go to [Sageworks|https://www.sageworksanalyst.com/] to view details."
}
Updated 6 days ago